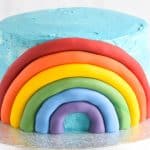
This gorgeous fondant rainbow is super easy to make and perfect for decorating a rainbow cake with minimum effort!
Today I have two blog posts for you - I'm sharing the fun cake I made to celebrate the end of the school year but I also think the fondant rainbow decoration deserves a blog post all to itself - it turned out so pretty and would be beautiful as a stand-alone cake decoration too.

When I was planning to add a rainbow to my cake I did lots of searching online for inspiration, but most of the icing rainbows I found were cake toppers and I wanted to add a fondant rainbow to the side of my cake, leaving the top free for other decorations. I was also very short on time - I only decided on the day that I was going to make the cake so I knew that I wouldn't have time for the drying out that a fondant cake topper needs.
In the end this quick fondant rainbow worked brilliantly and there was no need for any drying time - you actually need the icing to still be flexible when you place it on the cake so no advance work needed - perfect for a last minute rainbow cake!

Not only is this pretty rainbow cake decoration super quick and easy, but you also don't need any special tools or equipment to make it - just a flat surface and a sharp knife to trim the edges!
For my coloured fondant I used a mixture of ready-coloured fondant icings that I had leftover from another cake project, and coloured some of the fondant myself to create the six colours I wanted for my rainbow decoration. I already had ready-made fondant in yellow, red, green and blue, so I added a few drops of red gel to some of the yellow to make orange, and coloured white fondant with a mixture of blue and pink gels to make the purple. For gel food colouring I highly recommend Wilton Food Colourings - you only need a small amount to colour your icing or cake and the colour is really bright and vivid.
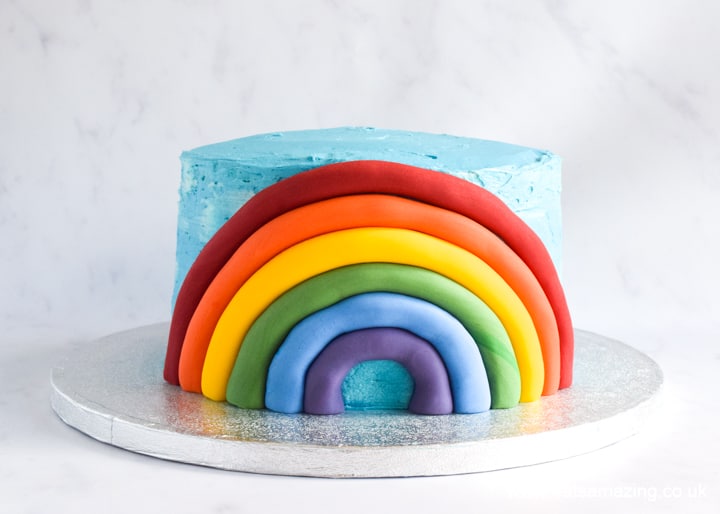
How to Make a Fondant Rainbow Cake Decoration
Ingredients:
- 3 layer cake, covered in blue buttercream
- approx 600g fondant icing
- gel food colours
Method:
First divide and colour your fondant icing. You can use ready-coloured fondant or colour your own with good quality gel food colourings. The six colours I used for my rainbow were purple, blue, green, yellow, orange and red. I used about 100g of each colour, though obviously needed a less for the smaller inner colours and a little more for the outer colours.

Decide which order you want your rainbow colours to be in, then roll the first colour into a long even sausage shape. Don't worry if the ends are a little uneven as these will be trimmed off at the end.
Bend the sausage of fondant around a small circle shaped cookie cutter to get a neat curve for the base of your rainbow. I used the second smallest cutter from my set of round nesting cookie cutters.

Repeat with the next colour of fondant, carefully bending it around the first arch. Don't press the fondant pieces together, as they will be separated again when applying to the cake - just gently bend them around to get the correct shape.
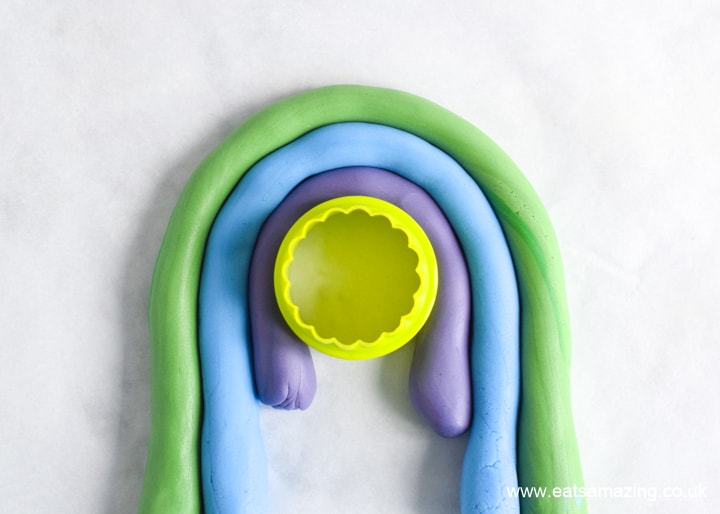
Repeat until you have used up all six colours. Carefully remove the cookie cutter, leave the arch shape intact.

Use a ruler and a sharp knife to trim the ends from base of the rainbow. Be careful to get as straight a line as possible for the perfect rainbow shape. Isn't it pretty?!

Carefully pick up the smallest arch and place it on the cake board at the base of the cake. The flat ends of the arch should stand nicely on the board, and the top of the arch rest against the buttercream. Push the whole of the arch very gently against the buttercream to help hold it in place.

Carefully transfer the next piece of rainbow into place, resting it on the first arch. Again, the ends of the arch should stand on the cake board and you should press the whole arch gently into the buttercream to help hold it in place.
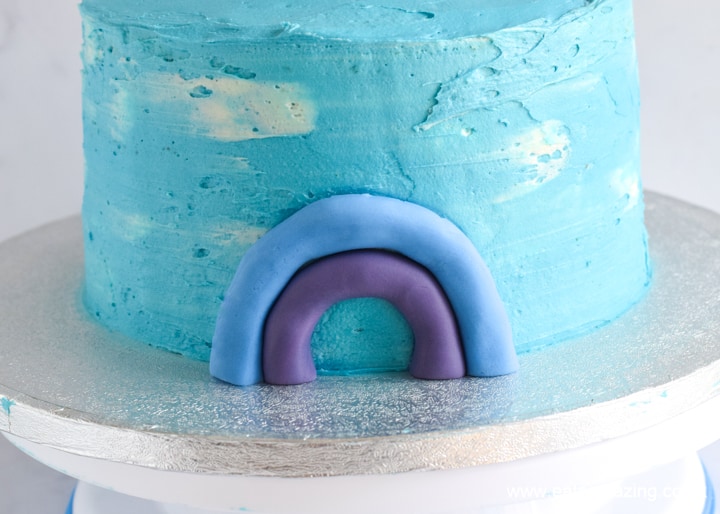
Repeat with the remaining colours. As this is quite a large rainbow, you'll find that each piece will start and end a little further around the cake, so the whole rainbow will end up wrapped around the front half of the cake.

Once all of the fondant colours are in place, gently press the whole rainbow to make sure that it is even and held securely in place by the buttercream.
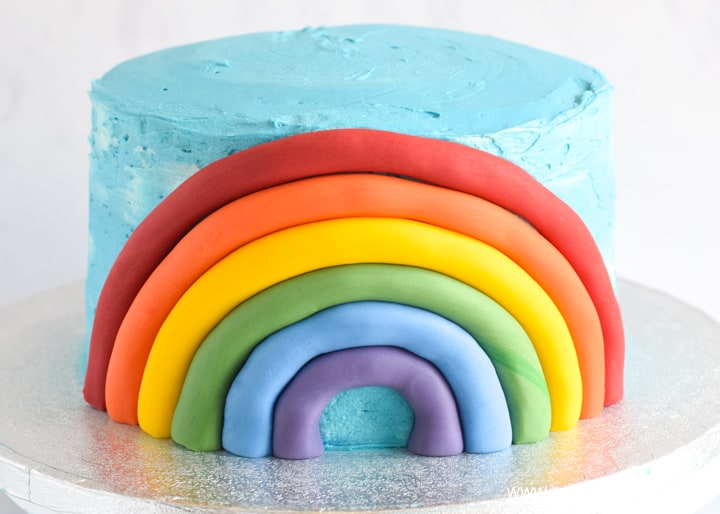
Serve as it is or add extra decorations to the top of the cake if wanted. You can see what I added to this cake and get the full cake recipe over in this blog post: End of the school year cake recipe.
If you enjoyed this tutorial, you might also like my easy rainbow cupcakes. Or for more quick and easy cake decorating ideas, head over to the cakes and cupcakes for kids section here on the blog.
Grace
Easy Fondant Rainbow Cake Decoration
Ingredients
- 3 layer sponge cake covered in blue buttercream
- 600g fondant icing
- gel food colours
Instructions
- First divide and colour your fondant icing. You can use ready-coloured fondant or colour your own with good quality gel food colourings. The six colours I used for my rainbow were purple, blue, green, yellow, orange and red. I used about 100g of each colour, though obviously needed a less for the smaller inner colours and a little more for the outer colours.
- Decide which order you want your rainbow colours to be in, then roll the first colour into a long even sausage shape. Don't worry if the ends are a little uneven as these will be trimmed off at the end.
- Bend the sausage of fondant around a small circle shaped cookie cutter to get a neat curve for the base of your rainbow. I used the second smallest cutter from my set of round nesting cookie cutters.
- Repeat with the next colour of fondant, carefully bending it around the first arch. Don't press the fondant pieces together, as they will be separated again when applying to the cake - just gently bend them around to get the correct shape.
- Repeat until you have used up all six colours. Carefully remove the cookie cutter, leave the arch shape intact.
- Use a ruler and a sharp knife to trim the ends from base of the rainbow. Be careful to get as straight a line as possible for the perfect rainbow shape.
- Carefully pick up the smallest arch and place it on the cake board at the base of the cake. The flat ends of the arch should stand nicely on the board, and the top of the arch rest against the buttercream. Push the whole of the arch very gently against the buttercream to help hold it in place.
- Carefully transfer the next piece of rainbow into place, resting it on the first arch. Again, the ends of the arch should stand on the cake board and you should press the whole arch gently into the buttercream to help hold it in place.
- Repeat with the remaining colours. As this is quite a large rainbow, you'll find that each piece will start and end a little further around the cake, so the whole rainbow will end up wrapped around the front half of the cake.
- Once all of the fondant colours are in place, gently press the whole rainbow to make sure that it is even and held securely in place by the buttercream.
Notes
Loved this easy fondant rainbow idea? Why not save this post to Pinterest so you can easily find it again!


Leave a Reply